Today Alfie the ICE Sprint passed a very significant milestone:
So I thought it would be worth writing about how he has survived the last 17 months and what sort of maintenance he has needed in that time.
Statistics for the first 10,000 miles
Firstly, some statistics and information (for those of you who like that kind of thing). This also shows that I rather nerdily keep a track of lots of info about my cycling.
This is what the expenditure on the trike has been over his first 10,000 miles
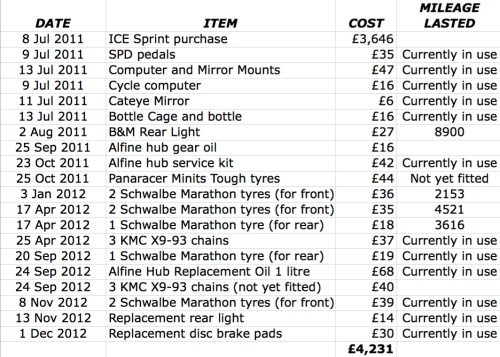
And this is how long the various consumable parts have lasted. Those items still on the trike don’t have a mileage beside them. Also note that I changed the supplied Marathon Racer tyres to normal Marathon ones that I already had (and had used for about 1000 miles) after about 500 miles as I got two punctures on the same day. I’m not a fan of the Marathon Racers, they are too puncture-prone for my liking. The Marathons seem much better. Marathon Pluses have too much rolling resistance for me and I don’t mind fixing the odd puncture.

And of course I have kept a record of the punctures I’ve had since I got Alfie – more than I got with the Trice Q but I think it’s a fairly random thing, although I’m surprised to have had two rear punctures in 10,000 miles as I only had one in 25,000 miles on the Trice Q.

You’ll notice that five of those punctures have been discovered when getting the trike out of the shed at home. This is a good reason to have a spare trike for those times when you’re in a hurry and you need to take alternative bicycle transport!
How does Alfie look after 10,000 miles?
So now all those statistics are out of the way, how has Alfie survived generally?
The main thing to note about my cycling is that I go out for about two hours per day every day, whatever the weather. He gets washed down now and again, a bit of chain oil every few months or so, but that’s about it. This is not a trike that is kept in a nice warm house and serviced regularly, it’s an everyday workhorse that has to survive the worst of living in the countryside with mucky roads, deep puddles and an owner that’s often in a hurry to put him back in the shed and go and have a shower/cup of tea.
As I passed my 10,000 miles milestone today I decided to take some photos of Alfie as he looked when I got home (at 10,015 miles, 16,117km).
Here he is outside the shed waiting for a clean.

I took a lot of photographs of the various bits of the trike that do tend to get mucky in the rain. Here is the axle which has the dynohub cable and also the cable for the bike computer (wrapped around the bottom of the king post).
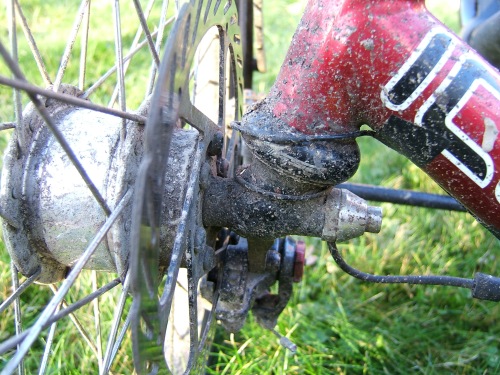
This is a view from the top of the left hand side disk brake. This brake is on top of the wheel, the other brake hangs underneath and gets muckier (thus I have already had to change the pads on the right hand side brake but not the left one).

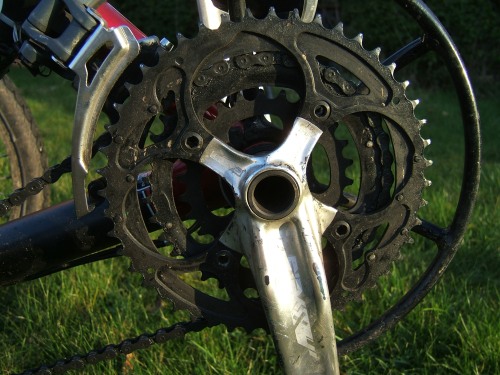
Front chainring still looking pretty good although the cranks have had the odd scrape and have some marks on them.
The Alfine trigger shifter is still working well, with just a slight scarring of the plastic on the down shifter after 10,000 miles of lots of clicks! You can see the gaffer tape wrapped around the cable where it disappears into the bar end stopped is wrinkling up where the cable tries to pull through. That was my repair on my Berlin to London ride so it’s survived six months OK!
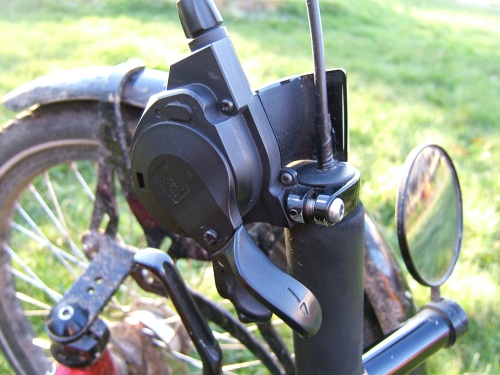
A lot of muck gets thrown up onto the handlebars when you’re riding in the rain. The screws holding the brake and gear systems in place on the handlebars are getting quite rusty – it will be interesting if I have to undo them in the future!
My Alfine hub gear gets more attention than the rest of the trike as it has its service every 4000 miles or so. When I wipe it the metal comes up lovely and clean whereas the dynohub has dulled in the last 10,000 miles. A better quality of stainless steel on the hub? Or perhaps it gets less road grot thrown up at it.

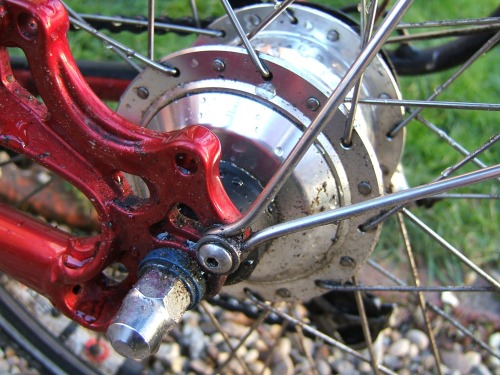
A side view of the hub. Where the mudguard is screwed to the frame is a fantastic little pocket for bits of mud and grime that is very difficult to clean.

The rear parking brake which hangs off the bottom of the back wheel gets the worst of all road conditions, periodically having a bath if I go through a big puddle. It doesn’t work as effectively as it used to but is enough to lock the bike in place when I pop into a shop or something.
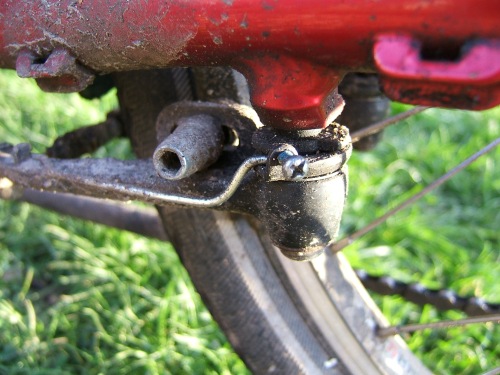
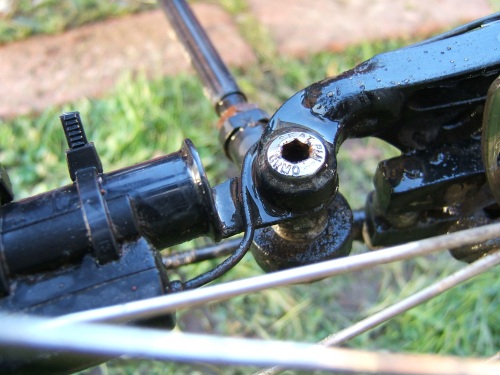
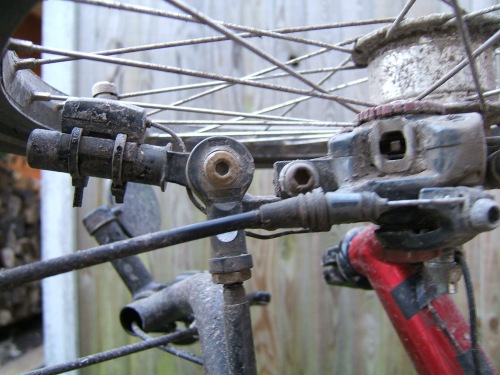
Now this is the only real problem that I foresee at the moment. This is the little mount for the bike computer on the front right wheel. You can see an allen/hex key socket in the centre of the picture – however this has completely rusted in place and it’s impossible for me to loosen it. I wanted to do so when I accidentally bent the arm of the mount and hoped to take it off and flatten it out. In the end I had to bend it back into place in situ and I hope there’s no other reason I ever have to undo this bolt as I think it may be Mission Impossible.
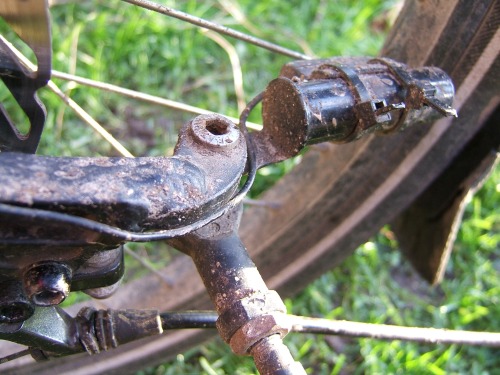
Another view of this completely stuck section – the bottom bit of metal is the right hand track rod which is how the trike steers.

EDIT: One of the people who left a comment on this blog told me that the allen bolt at the top is not meant to be undone, you should instead undo the bottom bolt. So I had a go and lo and behold it worked! So this isn’t actually the problem I thought it was.
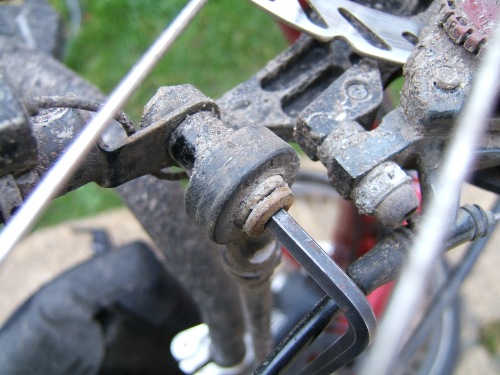
Here are some pics of me undoing this bolt.
Firstly I had to scrape out some bits of mud and rust from the allen bolt hole (the trike is lying on its side so I can access this area; the brake cable rather gets in the way though!)
After some scraping I was able to get the allen key in and after a bit of effort it started undoing.
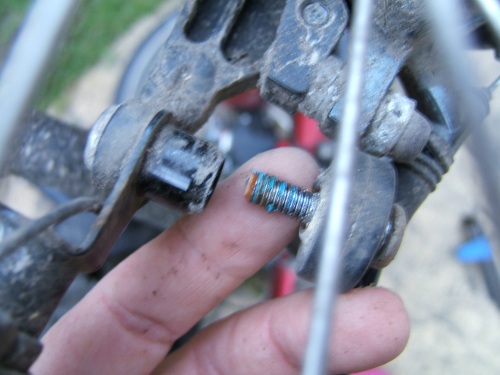
And here it is undone. I was able to move the cycle computer mount as necessary.
I did it all straight up again – at least I know now what to do if I ever need to remove the bike computer mount. Thanks to Dan Dickson for his comment below!
This is the back of the seat. Can you spot the difference? Within about five months I’d lost the little plug for the hole which stops the mounting for the seat slipping too far either side. At the moment it is theoretically possible for the seat to slide to one side but in reality the fixings at the bottom of the seat stop this happening (mostly). You can see that the plug on the right has been fairly squashed as well.
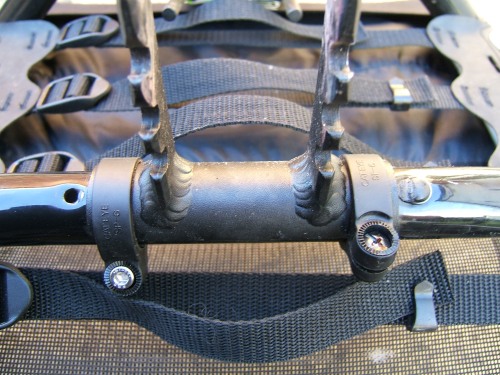
This is the base of the seat where it fits into the curved frame (see photo below). This looks OK on this trike, on my Trice Q this area has no paint left and has really suffered. It looks as though this fits slightly better on Alfie than my Q.

Here is the trough that the seat fixes into. That little silvery slash in the middle of the picture is a paint scratch, probably from the bolts that I have to turn to tighten the seat up. The right hand side bolt has a tendency to undo itself fairly quickly and I think it can then rattle around a little and scratch the paint. I usually tell eventually that this has happened when I do a fast corner and feel the seat move slightly…
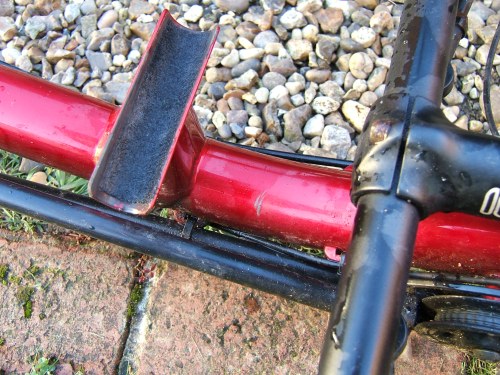
And here’s another scratch in the paintwork. I did this one within the first couple of weeks of owning this trike. It is a result of flopping the handlebars forward when folding the trike, not backward (i.e. the brake lever was touching the frame and made this cut in the metal). As soon as I realised what had happened I got into the habit of folding the handlebars towards the back of the trike and then folding the back wheel inwards and it was fine.

You may have noticed that the frame looks a bit wet – that’s because I decided, after taking the previous photographs, that I really needed to clean Alfie a bit if I was going to post lots of photos of him on the internet. So I gave him a quick wash down – the freezing weather outside and the fact that it was nearly dark meant I had to do it quickly so he’s still pretty mucky, but hopefully you can see a bit more!
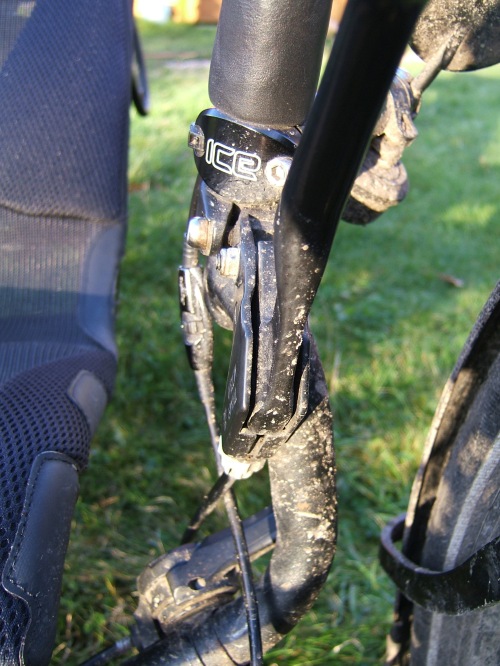
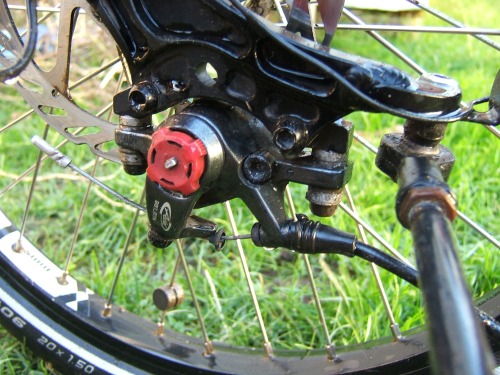
Here is a freshly-washed front left brake. Notice the little rubber top for the cable slides up and gets stuck – that’s probably because I have my brakes set for not too much travel before they work. This is the side with my weak arm and I want to be able to use the brakes without too much movement. The fact this rubber cover isn’t in place means (presumably) that water will run down the brake cable and I imagine when we have more cold weather I might have some exciting braking sessions when it’s freezing outside!
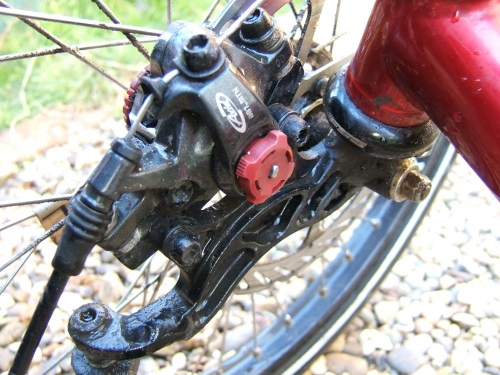
This is a side-on view of the brake on the right hand side (the one that hangs under the trike). You can see that the nuts for the wobble washers are pretty much rusted into place but I don’t think I will need to adjust these so I’m not too worried. The nuts that I need to undo to remove the brake (if I am removing the wheel) work fine still.
Here’s the Alfine hub still looking quite mucky. It’s very tricky to clean this without removing the wheel which I didn’t feel like doing. The carrier (the plastic bits that sit either side of the chain as it goes around the hub) tends to collect bits of grass and grot and I have to scrape thick chunks of goo out periodically. I also find that if there’s too much muck where the gear change cable goes then some of the gears tend to slip a bit – looking at this photo I really need to sort that out else I’ll have some weird gear changes over the next week or so.
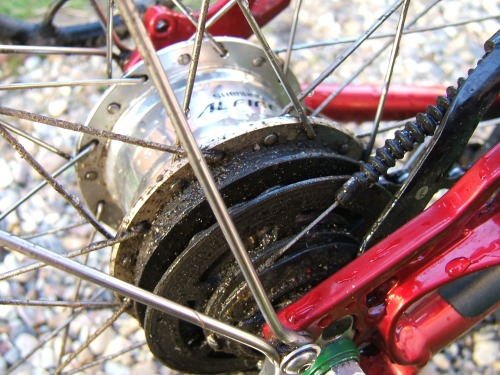
Note lots of small spaces for bits of muck to get caught.

I’m still on the original jockey wheels for the chain tensioner (the Sora derailleur). Although the jockey wheels have worn a bit, they don’t have to do any work except keep the chain in a straight line so I can keep them until they are virtually toothless. Which is a good thing as they aren’t as cheap as you might think!
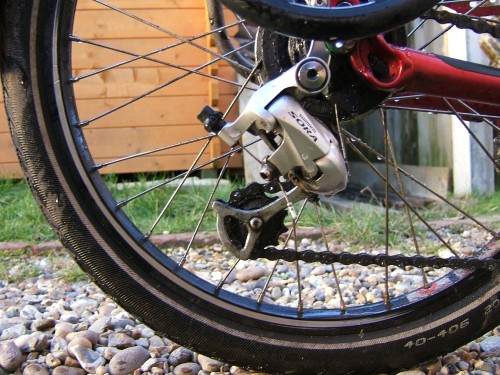
This is a view of the idler, which is a little pulley/wheel thingie that guides the chain from the front of the trike to the back. I learned a lesson with the Trice Q when we were unable to loosen the bolt that holds the idler in place (when we wanted to change the idler) and so every few months we just release this bolt and then tighten it again. It’s at pretty much the lowest point of the trike and gets no end of water splashed up at it.

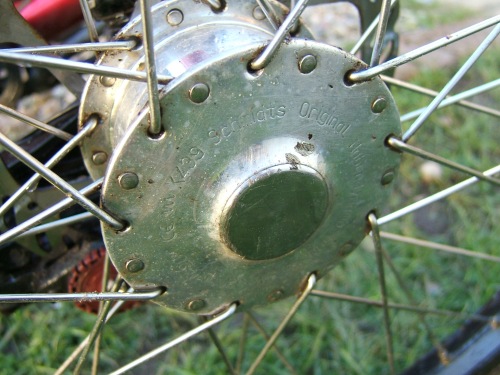
And here is my SON (Schmidt) dynohub. This is one of my favourite things about the trike but, as mentioned above, the metal has not survived the last seventeen months as well as the Alfine hub’s metal. It’s gone quite dull, presumably as a result of the salt on the roads last winter. It’s impossible to clean the gunk out from the spoke holes, of course.
You can also see a darker mark in the middle – this is actually a gouged bit of metal where I miscalculated the width between two metal pillars. CLANNNNNNNGGGGG! Going from 5mph to 0mph in record time, I left a small piece of my dynohub metalwork at the gates of Essex University.
This is the previously-mentioned bolt holding the bike computer sensor to the top of the track rod. The bolt that is immovable. Oh well.
And this is the part of the trike that is absolutely my bete noir. And there are three of them! Three on both trikes! Yes, the mudguard flaps.

The mudguards always seem to be the weak spot on these trikes in my experience. The front guards rattle like billy-oh, the back mudguard tends to be a bit better behaved but only if you have normal small tyres and not Big Apples. But all three mudguards have these mudguard flaps which are great when you first get the trike but after a few thousand miles start to rattle. And rattle. And rattle. And rattle even more.
The rattle is caused by the rivet (which you can’t see in my photo as I have gaffer taped over it to try to stop it rattling). The problem is that occasionally the mudflap gets twisted to the side (if someone walks too close to the back of the trike, for example) and the twisting gradually grinds away at the rubber and soon it is all loose. And then the rivet starts rattling, if you go really fast round a corner the mudflap slides across and starts rubbing, and you get a very annoyed Auntie Helen who tries to gaffer tape it within an inch of its life. Which works until it rains and the gaffer tape gives up.
On my Trice Q I got so fed up with it a couple of years ago that I ripped the mudflaps off. Much quieter, hurrah, but on the first rainy day I discovered that the wheels now flicked 90% of the water into the trike rider’s face (and the rear mudguard, without mudflap, flicked 100% of its water into the face of my husband riding behind). A quick email to ICE, with me feeling very abashed for being destructive on my mudguards, solved this issue as they sent me three new mudflaps with some fixings screws (I don’t have a rivet gun) but these replacements still rattled.
So I have learned not to rip the rotter off on Alfie but I am still really cheesed off with the rattling. This means if I think it’s going to be a dry day I take the mudguards off so I can ride in silence. This does mean there is the occasional issue with unexpected rain/puddles…
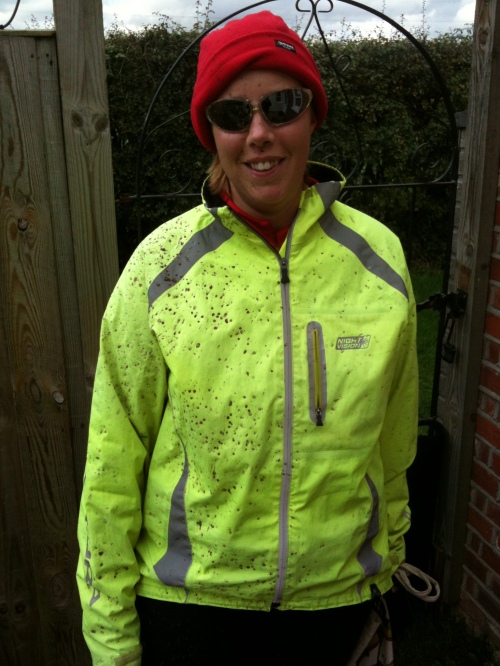
Overall thoughts about the trike after 10,000 miles
Regular readers of my blog will know that I am very happy with Alfie and find him a very comfortable trike. Issues with the mudguards aside, he still feels as well put together as he did the day I first rode him, without lots of mystery squeaks and noises that the Trice Q tends to suffer from. He still goes in a straight line and the brakes work well.
Alfie was not an off-the-shelf ICE trike option as I specified the hub gear and the hub dynamo which weren’t standard. I am very happy with both of these items and would definitely choose them again if I had to buy a new trike. The German trike assemblers in Willich were trying to convince me the other day that the Adventure is a better option (it’s higher off the ground) but I like the Sprint’s speedy feel and the fact that it always feels very stable and safe. I suppose something I might have considered a bit more is the larger rear wheel which might make some of the gearing a bit easier (I have a whole set of low gears I never use but do spin out on the high gears above 30mph).
This trike is much kinder on chains. The Trice Q got through chains every 3000 miles, this trike seems to manage double that. I assume that’s because I don’t have a derailleur at the back to twist the chain, just the front derailleur (which doesn’t get used all that much each ride – I usually just stick it in the big ring and leave it there). However the hub gear built into the rear wheel does mean this trike feels a bit heavier at the back, particularly when you are starting off. Not a problem but it is something I notice when swapping between this and the Trice Q with its standard derailleur system. I absolutely love the fact that I can change gear when stationary on this trike, though, and I tend to use that feature all the time – which makes for some amusing high-gear starts when I swap to the Trice Q and forget to change down when approaching traffic lights/a junction.
Alfie was an expensive bike but it’s well worth it for me and my usage, particularly with regard to the build quality (I’d be interested to see what a KMX is like after 10,000 miles, if it could actually be ridden that far in fact!). Once again the service from ICE (Inspired Cycle Engineering) is fantastic; I haven’t had to ring them recently but whenever I do call them they always give excellent advice and are really helpful. It’s good to know they are continually developing their product range and bringing in new features for the new trikes. If they could sort out the mudflaps someday I would be a very happy customer for some new ones!!!
So, 10,000 miles of slow sprinting – slow because I average less than 11mph over that time; sprinting because Alfie is a sprint (although I am definitely a more touring kind of person). But I have enjoyed every one of those 10,000 miles and I look forward to the next 10,000!


For mudflaps I’ve ripped off my flaps as well. The front ones are now silent and I don’t tend to get sprayed – I have the guards mounted with very little clearance though. I do occasionally pick up water thrown out of the front of the guards…
The rear has had a long flap from SJS fitted. I had to cut the very tail off the guard to allow the hole in the new flap to reach the hole in the guard, so there is a little gaffer tape over the end (no sharp cut edges) and I used a nut and bolt to secure. That’s looking fine after a few thousand miles, and is really good protection for the kids trailer (which I suspect follows even closer than your husband 😉 )
I’m half wondering about making an experimental mudguard out of a plastic bottle (like Audaxers do) and seeing if that works – after all, it won’t matter if I lose it as there are plenty of bottles available. I’m just nervous about taking off the rivets as it’s a permanent solution!
Hi Aunty H
You can fix the rattly mudflaps as follows. (All parts stainless – available from screwfix)
Penny Washer
M5 washer
M5 Screw
M5 nylock nut.
Replace rivet with the two washers, screew and nut. The penny washer should be on the inside of the guard gripping the rubber of the flap. The smaller washer on the outside to spread the load a little. Nylock nut on the inside with the penny washer.
This is what I ordered. I’m not sure if I needed the 12mm or 16mm screws:
Socket Button Screws A2 Stainless Steel M5 x 12mm Pack of 50 42401 £2.31 1 £2.31
Socket Button Screws A2 Stainless Steel M5 x 16mm Pack of 50 62787 £2.53 1 £2.53
Penny Washers A2 Stainless Steel M5 x 25 Pack of 10 64837 £1.24 1 £1.24
Nylon Lock Nuts A2 Stainless Steel M5 Pack of 100 54093 £3.41 1 £3.41
A2 Stainless Steel Flat Washers M5 Pack of 100 29763 £0.99 1 £0.99
Thanks for this Tony – I’ve now done my own modification (using some nuts and bolts ICE had already sent me). I’ve written it up as a new blog post. Here’s hoping it works!
PS – that’s tonycollinet on yacf.
Sorry – can’t edit comments: I’ve just checked – I left the rivet in place, and put the m5 hole/screw for the penny washer arrangement lower down the guard, but the edge of the washer is very close to the rivet..The two fixings prevent any rotation of the flap.
On your hex screw that holds your computer sensor in place, the top doesn’t turn as there is a small tab that locks it in place while the ‘nut’ hex screw on the bottom does turn. You should be able to back it out, at least on my newer Adventure series, it does. Great post and information.
Dan
Dan, thanks for this comment which I saw ages ago but didn’t get round to checking. Anyway, as you’ll see from my update to the blog above, you are indeed correct and the allen bolt underneath (rather than on top) is the one that undoes. So that’s one potential problem removed! Thanks again!
Hi Auntie just started to read your page. I like the trike on the upper right side hahaha just like mine : )) ..curieus whatelse you ‘r writing about..
Hi Helen thanks for the report – from a fellow member of the dirty trike club 🙂 I keep a garden pressure sprayer handy for a quick trike rinse on days when the salt is splashing around. Only the rear mudflap noticeably slack so far, caught on a cycle stile thing as I hauled it over. I think a little silicon rubber will damp the slight rattle if it gets to me too much.
Pedal on, missus.
JJ.