Those who have read my previous blog post 10,000 miles of slow sprinting will be in no doubt that I get irritated by rattling mudguards.
Tony Collins posted a couple of comments on my blog suggesting a possible fix for this. So after procrastinating for ages (mucky mudguards and annoying rattles are just a pain and it’s never quite the right moment to sort ’em out!) I finally decided to get round to it on the penultimate day of the year. I had already reached my year’s cycling target of 8,000 miles so had no excuse not to fiddle with the trike.
Fortunately for me in my several years of trike ownership I have become on very good terms with ICE and, having previously destroyed a couple of mudflaps and complained to ICE about them, they had sent me a little package of replacement mudflaps and nuts and bolts. I had used one of this package but still had three left (clearly they had already decided I was going to continue in my mudguard-destroying ways). Tony Collins had sent me a parts list of the required nuts and bolts but I was just able to fetch my little parcel from ICE from the shed – bonus!
So here are the three mudflaps and three sets of nuts and bolts
A close-up of the nuts and bolts.
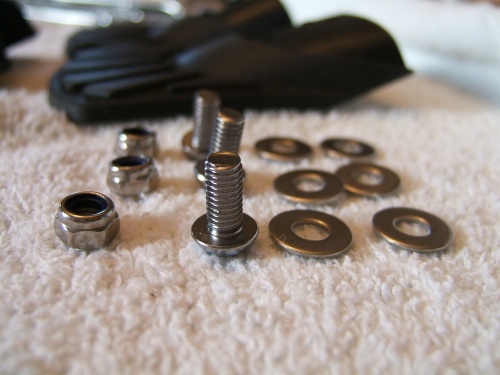
As it happens I have managed not to tear off any of the mudflaps in annoyance this time (I learned my lesson when I did this on the Trice Q and ended up covered in mud the next rainy ride – those flaps do make quite a difference!) so I didn’t need to use the replacement flaps. What I was planning to do was to put a second bolt through the flap lower down to keep it in place (they are currently able to rotate from side to side a little).
Undoubtedly there’s a reason that they are not bolted firmly in place; however, they do tend to get rattly over time and the only way I can stop the rattle is by wrenching the flap to the side so it’s jammed tight and doesn’t move and then it’s quiet. So a second bolt ought to hopefully help. We also decided to liberally apply some glue in the hopes that that would also quieten things down a bit.
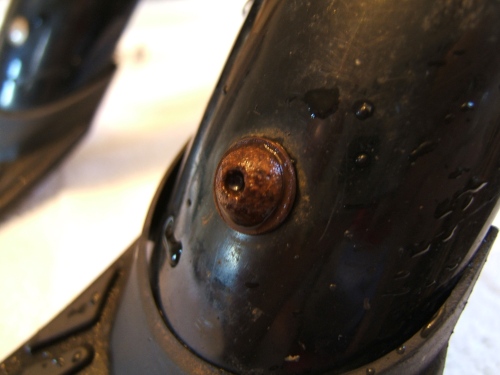
Now, before I started the job I needed to give the mudguards a good old clean, so I had them in the shower with me after my morning’s cycle ride and made sure they were as clean as I could get. As you can see from the picture below, I have already had to replace one mudflap (which was torn off when wheeling the trike up a kerb) which is why ICE sent me the parcel of spares. However, it’s also clear that the nuts and bolts are less keen on their watery environment. This one has rusted in place now (it’s been on the trike for about a year) and it’s impossible to undo with an allen/hex key as the top has all just crumbled.

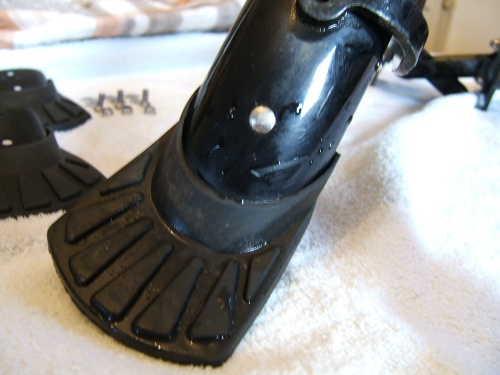
This is the other side which still has the original rivet. that looks much better visually but this side is much more rattly.
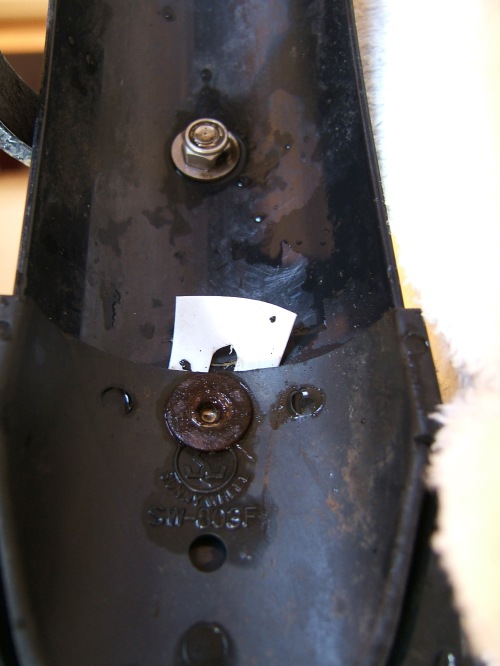
Here you can see a previous modification I undertook to reduce the rattle slightly – a small piece of plastic milk bottle stuck around the inside of the rivet to reduce the space. It worked surprisingly well – and indeed has lasted several months just jammed in place like that!
However, plastic milk bottle bits don’t quite have enough oomph to overcome a determined mudguard rattle and seeing as it’s winter and Alfie has to wear his mudguards all the time (it’s been rather wet in England!) I really needed to do something more permanent and functional.
Here was the operating table set up ready to go!

My husband is a handy chap to have around as he has a lot of DIY equipment and, more importantly, a significant amount of common sense about how to do these things.
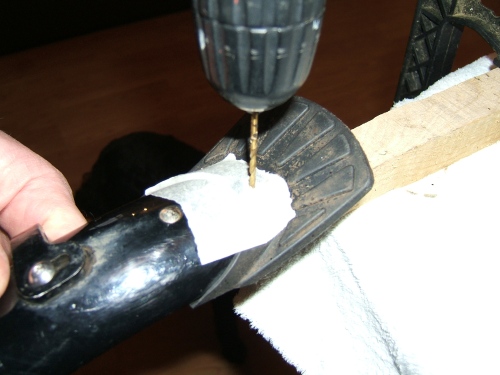
He gathered a bit of kindling from our log pile, clamped that to the table and then started to drill a hole through the rubber of the flap, through the metal of the guard and then the other side of rubber. To make things less prone to move around we stuck some masking tape over it all.
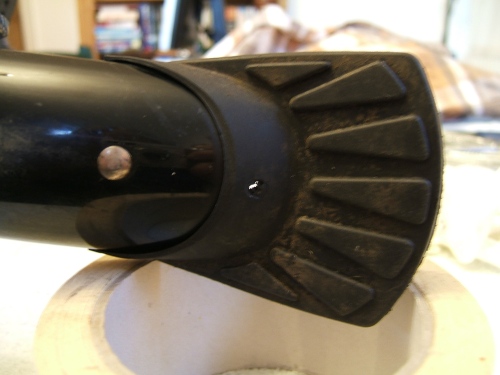
Here it is after the first hole was drilled.
Without the masking tape – you might just see daylight through it!
At this point we decided to put some glue around the mudflap to hopefully keep it in place more effectively when on the bike. James found his tube of Evo-Stick glue and, after a bit of a battle with it to unblock the nozzle, we managed to squirt glue around the mudguard and generally over my fingers (I’m still picking bits of dried glue off my hands two hours later!)
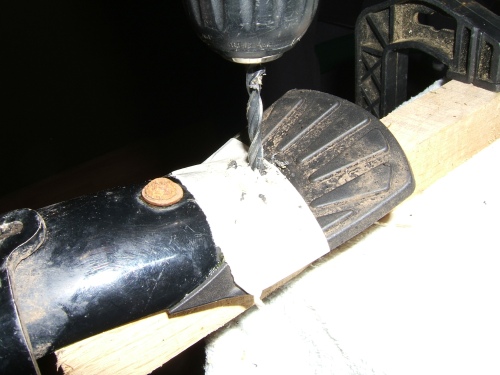
We then tried to push the nut through but the hole was a bit too small. Should have checked that one beforehand!! Time for some more drilling (spot the glue oozing out of the mudflap/mudguard interface!).
The hole was now big enough and I just had to put the bolts through (with a washer each side).
It was difficult to know how much to tighten the bolt up. Too much and the rubber all gets twisted, too little it might all shake loose. As it was the mudguard was deforming and the glue was becoming quite obvious so this isn’t as attractive a solution as I had hoped.
Anyway, I did it up to what I thought was a reasonable tightness and then we dabbed some threadlock on the exposed nut head of the bolts. This is where lots of water will be flying around so it’s a pretty hostile environment overall.
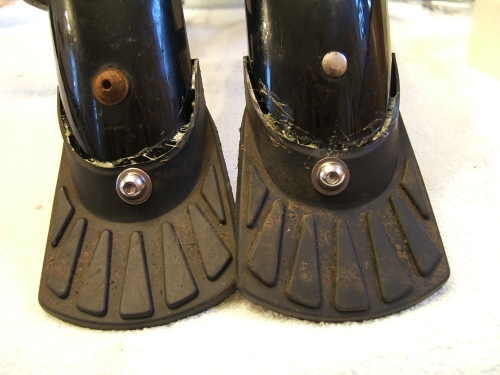
It looks better on the outside, although you can still see where the bolts have deformed the rubber (and our glue is very evident). I might put a bit of insulating tape or something over this little pocket once the glue has dried.
So after the glue had mostly dried I re-fitted the mudguards to the trike.
So, does it work? Do my modifications, which have made the mudflaps less attractive (glue-filled pockets for the whole world to see), pass the “Does It Rattle Test”? I don’t know, I haven’t been out cycling yet, but here’s hoping! I shall report back tomorrow…
Update
It works! No rattling!
I’ve now cycled 25 miles with my newly-furbished mudguards and it seems that the rattling issue has (at least temporarily) been fixed. Hurrah.
I can now hear the rattling of my bell and the noise of the chain through the chain tubes seems louder…







Hi Auntie Helen,
I’ve found that epoxy rapid works better than evo-stick.
Apply the glue first working it right down inside and around the rivet. Smooth it around the edges.
LET IT SET approx 1/2 hr.
This will be water proof.
(optional)
=======
Then drill the second hole from the inside using the hole already in the flap, this way you are not squashing the inner and outer flap together and distorting it.
The only downside to gluing is WHEN the flaps get caught or torn off you’ll have to replace the mudguard as well as it WILL break (guess how I know)!
Needless to say I won’t be riding down any kerbs again!!
HTH